Socket welds are used in numerous applications throughout the nuclear industry and due to the unique configuration, size and other limitations, ultrasonic inspection can be challenging.
Westinghouse Inspection Services has the equipment, qualifications, and personnel to perform socket weld inspections for the thermal and vibration fatigue degradation mechanism. Even a slight stress flaw is detectable with the help of Westinghouse’s experience and advanced technology.

In order for a nuclear power plant to obtain a license extension and continue to operate safely, it must meet all of the aging material requirements. Since materials and fixtures can degrade over time, especially when subjected to extreme temperatures and vibrations, it is of the utmost importance to ensure that these welds remain intact.
The Westinghouse team can inspect multiple welds for both vibration and thermal fatigue flaws in a 12-hour shift. Exam time varies depending on crew access, type of scan (thermal, vibration or both) and other activities on site.
If flaws are identified upon inspection, Westinghouse can mobilize the equipment, tools and personnel at request to perform the repair or replacement of the affected socket welds keeping your facility in alignment with the aging materials progams and on track to obtain license extension for continued safe power generation.

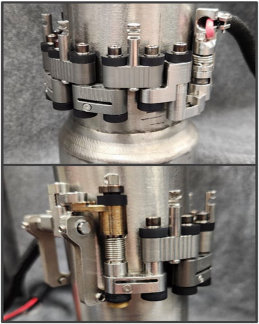
The Westinghouse scanner shown below wraps around the pipe at the weld, which is connected to a monitoring system that collects the data and displays the scans.
The scanner is capable of inspecting welds from 1 ½ to 3 inches in nominal diameter on schedule 40 to 160 stainless steel socket welds. Only 3 inches of radial clearance is required as well as 3 inches of clearance from the exam area on the pipe surface.
The scanner uses manual encoded phased array UT (ultrasonic technique) to look for degradation from both vibration and thermal fatigue in one scan. The thermal scan is focused on the inside diameter (IOD), looking for axial, circumferential, and off-axis fatigue flaws. The vibration exam reaches down to ¾ inch diameter, looking for circumferential flaws at the toe or root of the weld.

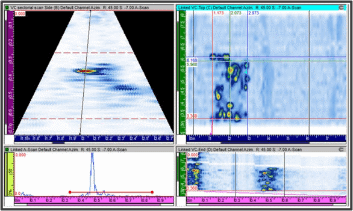
Example of a UT scan
Inspect. Detect. Protect.
Your trusted partner for tailored,
non-destructive examination solutions